
If you’re like me, you’ll have days where focusing on your tasks is harder than normal. Perhaps your moods get the best of you, especially during the long and darker days of winter. If you face these issues, then this essential oil necklace will be one project that you’ll actually want to have on your to-do list.
It is a simple and easy project with so many benefits. These pendants can be used on a string for a necklace. They can also be hung on a shorter piece of string to hang in your car or closet as an air freshener.
By adding a few drops of your choice of essential oils, you’ll get a quick pick-me-up. This essential oil necklace will help you focus or fight that stressful day ahead of you. They also make great gifts for friends or family. Let’s get started!
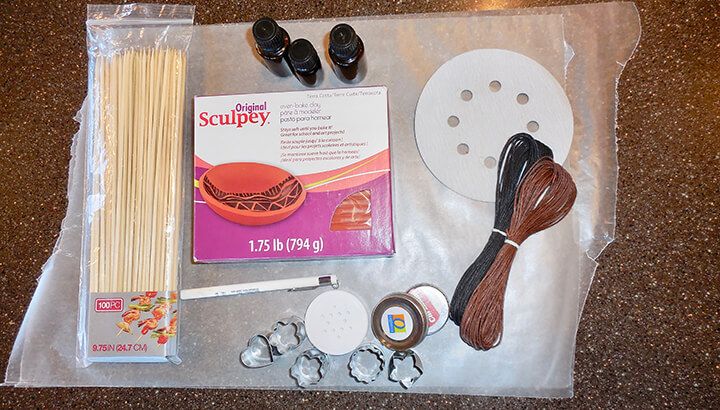
Essential Oil Necklace Ingredients
- Terra cotta clay (I bought the type that you bake, but some air dries as well)
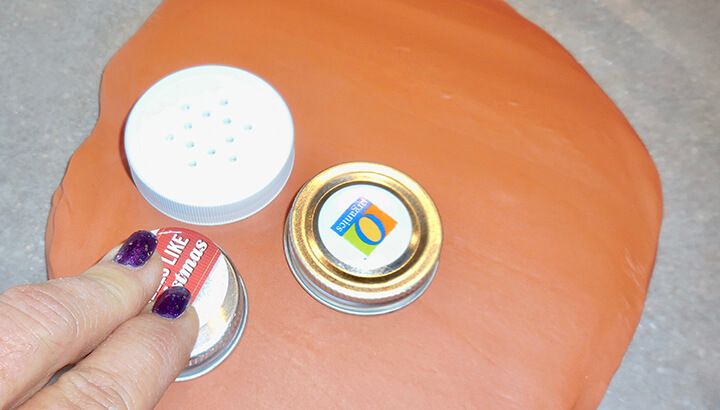
- Any lid or cookie cutter of your choice (I use different shapes and sizes)
- A straw, pen cap or anything that makes a large enough hole for the pendant string
- Hemp cording (or leather lacing)
- Wax paper
- Stamps to use on the pendants
- Skewers or toothpicks for popping air bubbles
- Sandpaper
- Essential oils of your choice
Instructions
1. Gather all of the supplies.
2. If you are using the bake-type clay, follow the instructions and preheat the oven.
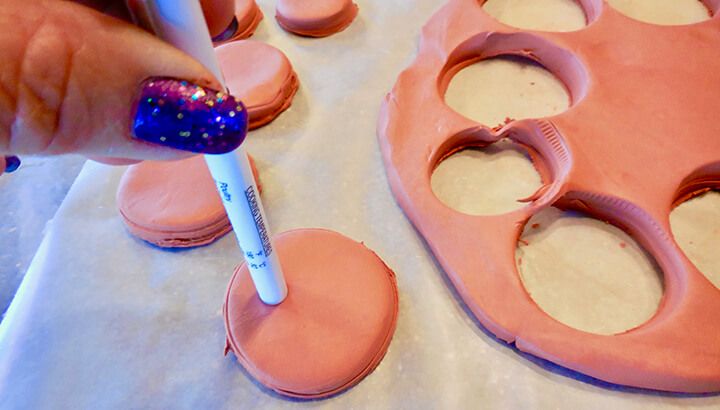
3. Roll out clay on surface covered with wax paper until it is about a 1/4-inch thick.
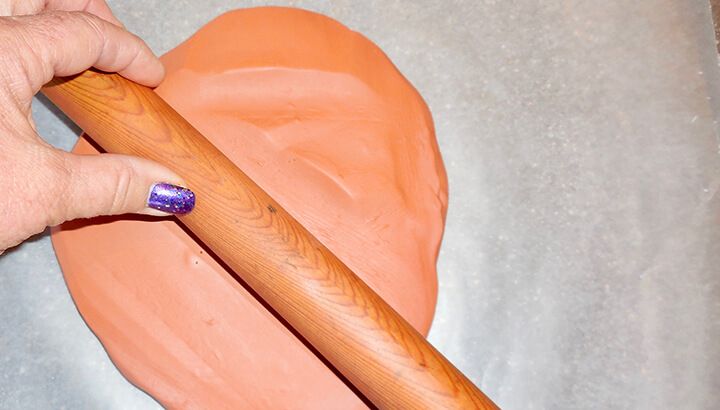
4. If there are any bubbles that come to the surface while you are rolling the clay, use a skewer or a toothpick to pop them. Continue rolling the clay.
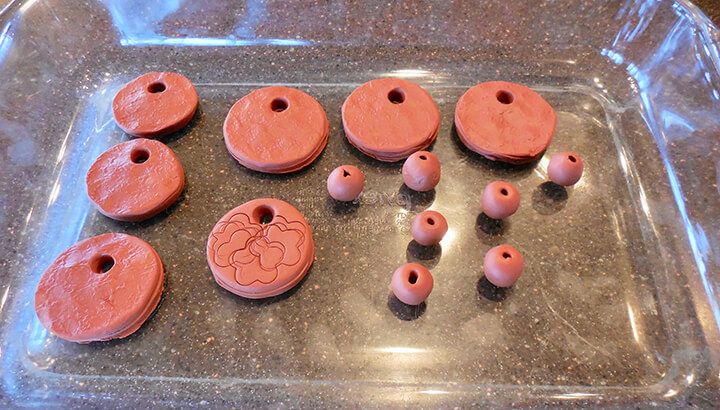
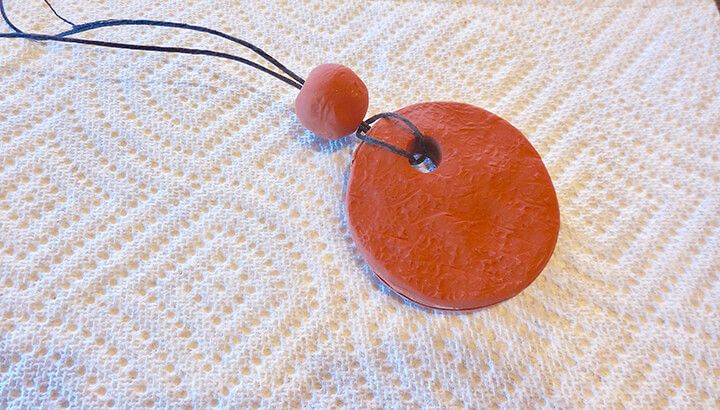
5. Press the lid or cookie cutters firmly into the clay to create your shapes. I also made a few beads to add to my pendants.
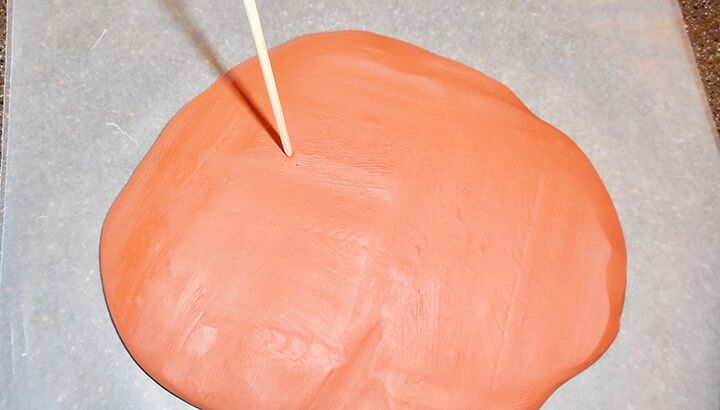
6. Using a straw or pen cap, make a hole for the string to pass through. If you are making beads, pull off a small piece of clay and roll until small marble size. Using a skewer, Push all the way through the bead.
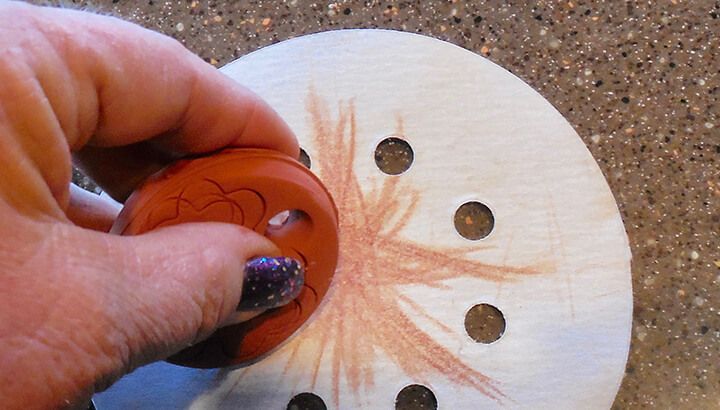
7. Place pieces on a glass baking dish and follow the baking instructions on the package. I embossed my pieces with an engraved ring I have. You could also use a stamp.
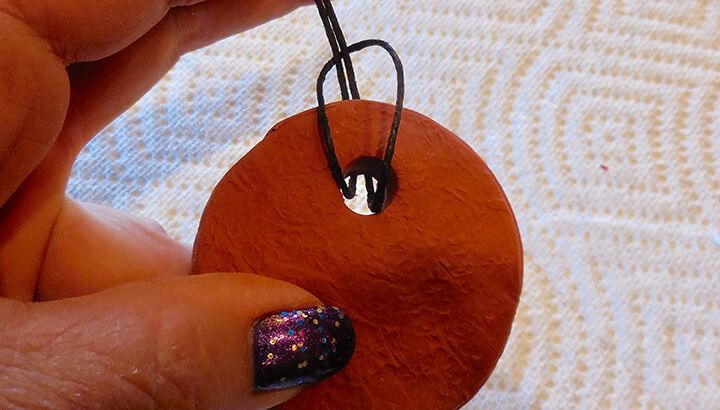
8. When pendants and beads are cooled, use a piece of sandpaper to smooth out the rough edges.
9. Measure out the desired length of the hemp string. Make sure it is long enough to fit over your head. When you have the right length, fold the cord in half and slip the middle through the back of the hole toward the front of the pendant, forming a loop. Take the ends of the cord, slide it through the loop and tighten. Tie a knot at the end.

10. Add a bead if you want before you tie the ends together.
11. Add a drop or two of any essential oil of your choice. When the scent disappears, just add more.
— Leilani Hampton
